In the ever-connected world we live in, having access to a secure and reliable internet connection is crucial. Many individuals are constantly looking for ways to enjoy free internet, and one option that has gained popularity is using VLESS on Windows. This blog post will explore what VLESS is, its benefits, and how to use it on the Windows operating system.
What is VLESS and its benefits
VLESS is a secure communication protocol that allows for the encrypted transmission of data over the internet. It is an upgraded version of the popular V2Ray protocol and offers enhanced security and privacy features. One of the main benefits of using VLESS account is that it can bypass network restrictions and censorship, allowing users to access blocked websites and services.
Another advantage of VLESS is its ability to provide a fast and stable internet connection. This is particularly useful for individuals who rely on the internet for work, as it ensures a smooth and uninterrupted browsing experience. Additionally, VLESS offers strong encryption, protecting your personal information from potential cyber threats and hackers.
How VLESS works on Windows
To use VLESS on Windows, you will need to follow a few simple steps. Firstly, you will need to download and install a VLESS client, such as V2Ray or Clash. These clients provide the necessary interface for configuring and managing your VLESS connection.
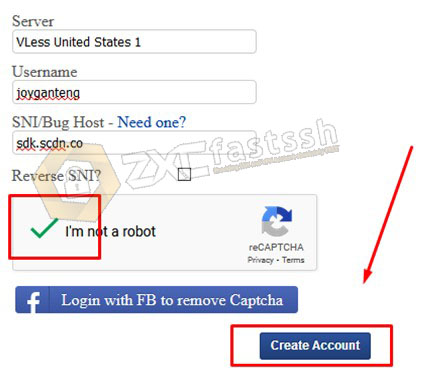
Once the client is installed, you will need to obtain a VLESS server configuration. This configuration includes the server address, port, security settings, and other relevant details. You can either create your own VLESS server or use a public server provided by a trusted source.
After obtaining the server configuration, you can import it into your VLESS client and connect to the VLESS server. The client will establish a secure connection, allowing you to enjoy free internet while maintaining your privacy and security.
In conclusion, using VLESS on Windows offers numerous benefits, including enhanced security, privacy, and access to blocked content. By following the steps mentioned above, you can easily set up and use VLESS on your Windows operating system, ensuring a secure and reliable internet connection.

Installing VLESS on Windows
Step-by-step guide to installing VLESS on Windows
-
Start by downloading and installing a VLESS client compatible with the Windows operating system, such as V2Ray or Clash. Visit their official websites and download the appropriate installer for your system.
-
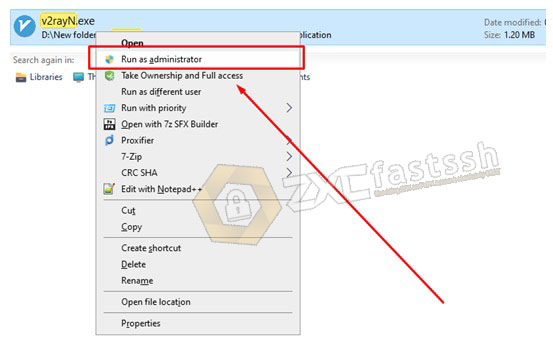
Once the client is downloaded, run the installer and follow the on-screen instructions to install it on your Windows machine. Make sure to choose the appropriate options, including the installation directory and any additional components you may need.
-
After the installation is complete, launch the VLESS client. You should see a user-friendly interface that allows you to manage your VLESS connections.
-
Next, you will need a VLESS server configuration. You can either create your own VLESS server or obtain the configuration from a trusted source. If you choose to create your own server, you can find tutorials online that provide step-by-step instructions.
-
Once you have the server configuration file, import it into the VLESS client. Look for the option to import or add a server, and select the configuration file. The client will automatically populate the necessary settings.
-
Finally, click on the connect or start button in the VLESS client to establish a connection with the VLESS server. If everything is set up correctly, the client will establish a secure connection, and you will be able to enjoy free and secure internet access on your Windows machine.
Troubleshooting common installation issues
Although the installation process is generally straightforward, you may encounter some issues along the way. If you encounter any problems, here are a few troubleshooting tips:
-
Make sure you have the latest version of the VLESS client and that it is compatible with your Windows version.
-
Check your internet connection and ensure that it is stable and reliable.
-
Verify that the server configuration file is correct and properly imported into the VLESS client.
-
If you are using a firewall or antivirus software, make sure to configure it to allow the VLESS client to access the internet.
-
If the connection is still not working, try restarting both your computer and the VLESS client.
By following this step-by-step guide and troubleshooting tips, you should be able to easily install and use VLESS on your Windows machine, providing you with a secure and reliable internet connection.

Configuring VLESS on Windows
Setting up VLESS server on Windows
To use VLESS on Windows for free internet access, you first need to set up a VLESS server. Follow these steps to configure a VLESS server on your Windows machine:
-
Choose a reliable VLESS server software compatible with Windows, such as V2Ray or Shadowsocks. Download the server software from their official website and install it on your Windows machine.
-
Once the server software is installed, you will need to create a server configuration file. This file contains the necessary settings for your VLESS server. Refer to the server software documentation or online tutorials for detailed instructions on how to create the configuration file.
-
After creating the server configuration file, save it in a secure location on your Windows machine.
-
Open the VLESS server software and import the server configuration file. The server software will use this file to set up the server according to the specified settings.
-
Start the VLESS server and ensure it is running without any errors. Note the server's IP address and port number, as you will need them later to configure the VLESS client.
Configuring VLESS client on Windows
Once you have set up the VLESS server, you can configure the VLESS client on your Windows machine to establish a secure connection and enjoy free internet access. Follow these steps to configure the VLESS client:
-
Download and install a VLESS client compatible with Windows, such as V2Ray or Clash. Visit their official websites and download the appropriate installer for your system.
-
After the client is installed, open it and navigate to the settings or configuration section.
-
In the VLESS client settings, enter the IP address and port number of the VLESS server. These details can be obtained from the server configuration file or the server administration interface.
-
Choose the appropriate security settings and protocols based on your preferences and the server configuration.
-
Save the settings and connect to the VLESS server by clicking on the connect or start button in the VLESS client.
-
If everything is configured correctly, the VLESS client will establish a secure connection with the VLESS server, providing you with free and secure internet access on your Windows machine.
By following these steps, you can easily set up and configure VLESS on Windows, allowing you to enjoy a reliable and secure internet connection for your browsing needs.

Connecting to VLESS Server
Establishing a connection to VLESS server on Windows
To enjoy free internet access using VLESS on Windows, you need to establish a connection to a VLESS server. Here's a straightforward guide on how to connect to a VLESS server on Windows:
-
Download and install a VLESS client compatible with Windows, such as V2Ray or Clash. Visit their official websites and download the appropriate installer for your system.
-
Once the client is installed, open it and navigate to the settings or configuration section.
-
In the VLESS client settings, enter the IP address and port number of the VLESS server. You can find these details in the server configuration file or the server administration interface.
-
Choose the appropriate security settings and protocols based on your preferences and the server configuration.
-
Save the settings and initiate the connection to the VLESS server by clicking on the connect or start button in the VLESS client.
Testing the connection and verifying functionality
After establishing the connection to the VLESS server, it is essential to test the connection and verify its functionality. Here's how you can do it:
-
Open a web browser and try accessing different websites. Ensure that the websites load quickly and without any errors.
-
Test the download and upload speeds to confirm that the internet connection is stable and fast.
-
Check for any connection drops or interruptions during your browsing session.
If you encounter any issues or have concerns about the connection, you may need to review your server and client configurations or consult the server software's documentation for troubleshooting steps.
By following these simple steps, you can easily establish a secure connection to a VLESS server on Windows and enjoy free internet access while ensuring your browsing experience is reliable and secure.

Enhancing VLESS Performance on Windows
Optimizing VLESS settings for better speed and stability
To maximize the performance of VLESS on Windows and ensure a stable and speedy internet connection, here are some tips to optimize your VLESS settings:
-
Choose the right server: Select a VLESS server that is geographically close to your location. This reduces latency and improves the overall speed of your connection.
-
Adjust encryption and security settings: Depending on your needs, you can fine-tune the encryption and security protocols in the VLESS client settings. Finding the right balance between security and performance is crucial.
-
Enable compression: Enabling compression can reduce the size of data packets transmitted between your device and the VLESS server. This can help improve speed, especially when browsing websites with large amounts of content.
-
Utilize multi-threading: Some VLESS clients support multi-threading, allowing for simultaneous connections to multiple servers. This can enhance speed and performance, especially when accessing multiple websites or services simultaneously.
Using additional tools and techniques
Apart from optimizing VLESS settings, you can also utilize additional tools and techniques to enhance performance on Windows:
-
Use a reliable VPN: Pairing VLESS with a VPN can provide an extra layer of security and further enhance your internet connection's stability and anonymity.
-
Monitor and manage bandwidth: Keep an eye on your internet bandwidth usage and manage it effectively to ensure optimal performance. Closing unnecessary applications and avoiding bandwidth-intensive activities can help improve speed.
-
Regularly update VLESS client: Stay updated with the latest version of your VLESS client to benefit from performance improvements and bug fixes.
By following these optimization techniques and utilizing additional tools, you can enhance the performance of VLESS on Windows, ensuring a faster, more stable, and secure internet connection for your browsing needs. Remember to experiment with different settings and techniques to find the configuration that works best for you.


